Gravy is a beloved culinary companion popular among households in the United States. This recipe has a distinct taste that enhances a wide array of dishes. However, for individuals with gluten intolerance, traditional gravy recipes are off-limits due to wheat flour as a thickening agent.
Gluten-free gravy has been part of different cuisines for years. It emerged as a response to the growing demand for gluten-free alternatives. The taste of this recipe is similar to a traditional gravy recipe. One of the things that sets it apart is that it can provide you with the savory taste you need. This is without any adverse effect on your dietary health and requirements. Individuals can enjoy this recipe by replacing wheat flour with gluten-free thickening agents.
Ingredients/Equipment Needed to Prepare Gluten-free Gravy
There are several ingredients you need to prepare this dish. Here are some of the ingredients below.
- 2 tablespoons of gluten-free all-purpose flour: This ingredient substitutes traditional wheat flour. It provides the thickening agent necessary to achieve the desired gravy consistency.
- 2 tablespoons unsalted butter: adds richness and creaminess to the gravy
- 2 cups of gluten-free vegetable or chicken broth form the gravy base. It provides a savory and flavorful foundation
- 1 teaspoon of gluten-free tamari sauce or soy sauce: adds depth and umami flavor to the gravy.
- ½ teaspoon of dried thyme enhances the recipe’s flavor
- ½ teaspoon of dried rosemary: also enhances the gravy flavor
- Salt and pepper to taste: seasoning
You also need some kitchen tools or equipment to prepare this recipe. Here are some of the tools below.
- Saucepan
- Whisk or spoon
- Measuring cups and spoons
- Cutting board and knife
- Stove or cooktop
- Serving dish or gravy boat
A Step-by-Step Guide to Preparing Gluten-Free Gravy

Here is a step-by-step guide to preparing gluten-free gravy
1. Melt the Butter or Dairy-free Butter substitute over medium heat
To begin, melt butter or dairy-free butter substitute in a saucepan over medium heat. This step helps to create a base for the gravy and adds richness to the flavor. If you’re using a dairy-free option, ensure it is suitable for sautéing and melting.
2. Add Minced Garlic and Saute
Once the butter has melted, add the minced garlic to the saucepan. Sauté for 1 minute until garlic becomes fragrant. Sautéing garlic releases its aroma and enhances the gravy’s flavor.
3. Sprinkle the Gluten-free flour in the Saucepan and Stir
Sprinkle the gluten-free all-purpose flour into the saucepan. Use your whisk or spoon to stir continuously until it forms a smooth paste, a roux. The roux thickens the gravy and provides a base for the other ingredients. Once you have done this, cook the roux for 2-3 minutes. Cooking the roux ensures the flour is cooked properly and eliminates raw taste.
4. Add Gluten-free Vegetables or Chicken Broth
Slowly pour in the gluten-free vegetable or chicken broth while whisking the mixture continuously. This prevents lumps and ensures a smooth consistency. The broth also adds flavor and liquid to the gravy. Continue whisking until the mixture is well combined and smooth.
5. Add the necessary Ingredients/seasoning
Add the gluten-free tamari sauce or soy sauce, dried thyme, rosemary, salt, and pepper to the saucepan. You must stir the mixture well to incorporate the flavors. These additional ingredients add flavor and depth to the gravy. Tamari sauce or soy sauce provides a savory and umami taste, while dried herbs, salt, and pepper enhance the overall seasoning.
6. Reduce the heat to low and Let the Gravy Simmer
Reduce the heat to low and let the gravy simmer for 5-10 minutes. Stir the mixture occasionally while it simmers. Doing this will prevent gravy from sticking to the bottom of the saucepan and ensure even heating. This step also allows the flavors to meld together and the gravy to thicken.
7. Taste the Gravy and Adjust the Seasonings
Once you have followed the previous steps, you must taste the gravy and adjust the seasonings. Tasting the gravy allows you to adjust the seasonings to suit your taste. Add more salt, pepper, or herbs, according to your preference. You can add more salt for a saltier flavor, more pepper for a spicier kick, or additional herbs for extra aroma.
7. Remove from the heat and Serve
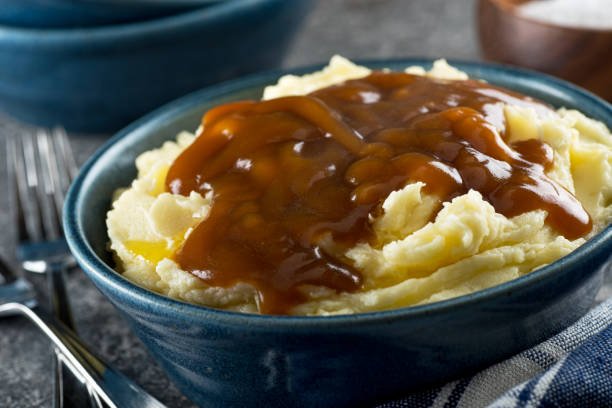
This is the last step in preparing this recipe. Once you get the desired consistency, remove the saucepan from the heat. The gravy should have a smooth and thick consistency that coats the back of a spoon. Allow it to cool down for 2 to 5 minutes, and serve the gluten-free gravy hot alongside your favorite dishes, such as roasted meats, mashed potatoes, or vegetables.
Tips and Tricks for Cooking Gluten-free Gravel
Here are some tips and tricks to improve the taste of this recipe.
- Use flavorful broth: Choose a high-quality vegetable or chicken broth as your gravy base. Homemade broth tends to have a richer flavor, but if you want to use store-bought broth, opt for low-sodium varieties to control the seasoning.
- Sauté the garlic: Sautéing minced garlic in butter or oil before adding flour can add depth and aroma to the gravy. Be careful not to burn the garlic, as it ruinates the taste.
- Season well: Taste and adjust seasoning as you need. Add salt, pepper, and other herbs or spices to suit your preferences. Common options include thyme, rosemary, sage, or Worcestershire sauce for an extra umami kick.
- Simmer for flavor development: Allow the gravy to simmer on low heat to let the flavors meld together for a few minutes. This helps develop a rich and well-balanced taste.
- Adjust consistency: If the gravy is too thick, add more broth or water to achieve the desired consistency. You can cook it longer to reduce and thicken it if it’s too thin.
What Are the Nutritional Benefits of Gluten-free Gravy?
Gluten-free gravy offers many nutritional benefits. Here are some of them below.
- Essential Nutrients: gravy can contain various nutrients depending on the ingredients used. For instance, vegetable broth can provide vitamins and minerals such as potassium, vitamin C, and folate. Additionally, using herbs and spices can contribute antioxidants and phytochemicals.
- Lower in Gluten: Gluten-free gravy suits individuals with gluten intolerance or celiac disease. You can eliminate gluten in the gravy by using alternative thickening agents like cornstarch or gluten-free flour.
- Lower in Fat: Depending on the recipe and choice of ingredients, gluten-free gravy can be made with less fat than traditional gravies. Using low-fat broth and reducing the amount of added fat can help reduce the overall fat content of the dish.
- Customizable Ingredients: The versatility of gluten-free gravy allows you to adjust the ingredients to fit your dietary needs. You can make it vegan using vegetable and plant-based fats or choose a richer flavor using meat-based broths and fats.
- Flavor Enhancement: Adding herbs, spices, and other seasonings to the gravy can enhance the taste without adding excessive calories or sodium. This can make your dishes more flavorful and enjoyable, encouraging the consumption of nutrient-dense foods.
Serving Suggestions for Gluten-Free Gravy
There are several serving suggestions for this recipe. Here are some suggestions below.
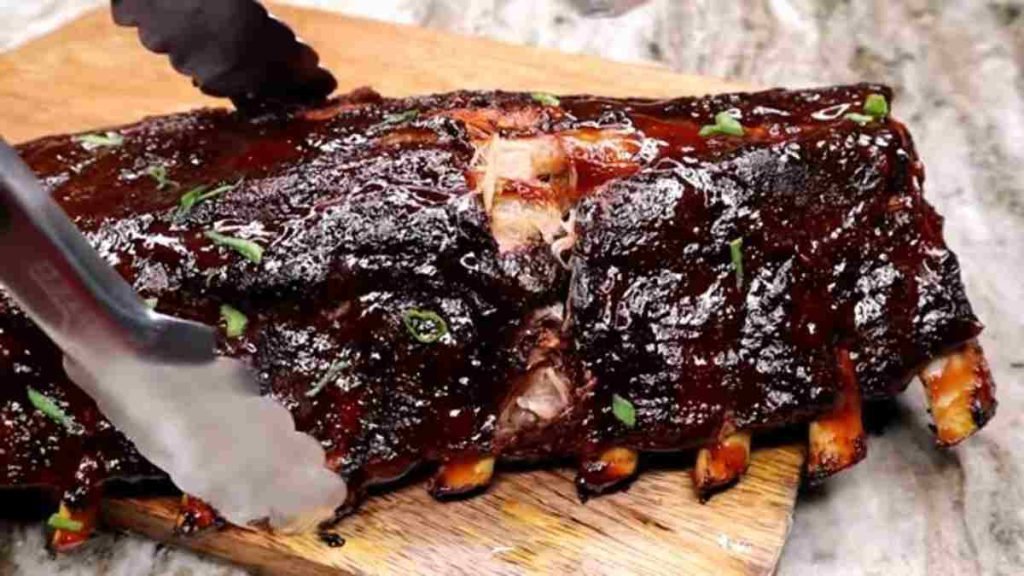
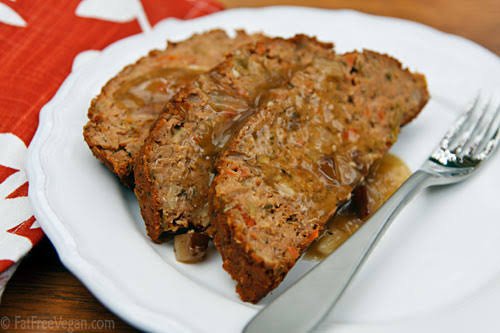
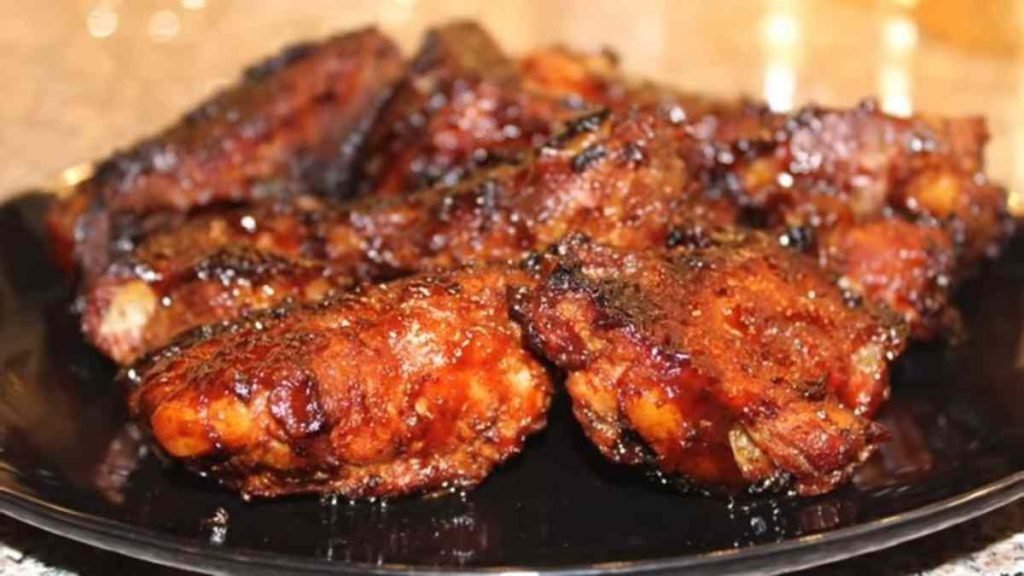
- Roasted Meats: Serve the gravy alongside roasted meats like turkey, chicken, beef, or pork. It pairs well with savory flavors and adds moisture and richness to the dish.
- Mashed Potatoes: Pour gluten-free gravy over creamy mashed potatoes. The combination of flavors and textures creates a comforting and satisfying meal.
- Biscuits: Drizzle gravy over warm gluten-free biscuits for a classic and indulgent breakfast or brunch option. The creamy and flavorful gravy complements the fluffy biscuits perfectly.
- Roasted Vegetables: Use the gravy for roasted vegetables such as carrots, Brussels sprouts, or cauliflower. It adds a savory element and elevates the dish’s overall taste.
- Shepherd’s Pie: Use gluten-free gravy as a base for a delicious and hearty shepherd’s pie. Layer it with cooked ground meat or plant-based protein, vegetables, and a topping of mashed potatoes before baking until golden and bubbly.
Storage Tips for Gluten-free Gravy
To preserve the taste of this recipe. Proper storage is essential. Here are some storage tips to adopt.
- Refrigeration: Allow the gravy to cool completely before transferring it to an airtight container. Store it in the refrigerator for up to 3-4 days.
- Freezing: If you want to store the gravy longer, you can freeze it. Pour the cooled gravy into freezer-safe containers or freezer bags, leaving some room for expansion. Seal tightly and freeze for up to 3 months. Thaw in the refrigerator overnight before reheating.
- Portioning: If you use gravy in smaller quantities, consider portioning it before storing it. This way, you can thaw and reheat only the amount needed, reducing waste.
- Proper Containers: Use airtight containers or freezer bags specifically designed for storing liquids to prevent leakage and maintain freshness.
Can I use Gluten-free Broth or Stock to Make Gluten-free Gravy?
Yes, you can use gluten-free broth or stock to make gluten-free gravy. Gluten-free broth or stock is made without any gluten-containing ingredients, such as wheat, barley, or rye. Instead, gluten-free alternatives like rice, corn, or potato may be used as a base.
To make gluten-free gravy, start by melting a gluten-free fat, such as butter or oil, in a pan. Then add gluten-free flour or gluten-free flour blend to create a roux. Gradually whisk the gluten-free broth or stock until the mixture thickens and forms a smooth consistency. Season with gluten-free herbs, spices, and other desired flavors.
It’s important to read the labels of store-bought broth or stock to ensure they are gluten-free. Some brands may contain gluten as additives or thickening agents, so always double-check the ingredients list or look for products labeled as gluten-free.
How Do I Avoid Cross-Contamination When Making Gluten-Free Gravy?
To avoid cross-contamination when making gluten-free gravy, follow these guidelines:
- Dedicated utensils: Use separate cooking utensils, such as pots, pans, spoons, and whisks, that have not come into contact with gluten-containing ingredients.
- Clean workspace: Thoroughly clean all surfaces, cutting boards, and countertops before starting. Gluten particles can linger and contaminate your gravy.
- Fresh ingredients: Choose gluten-free ingredients, including stocks, broths, and flavorings. Read labels carefully, as some products may contain hidden sources of gluten.
- Gluten-free thickening agents: Opt for gluten-free thickeners like cornstarch or arrowroot instead of wheat-based flour. Ensure they are stored separately and uncontaminated.
- Mindful preparation: Prepare gluten-free gravy separately from gluten-containing dishes. Keep ingredients separate and avoid using shared utensils or preparation areas.
- Labeling and awareness: Clearly label gluten-free gravy containers and inform others in the household about the importance of preventing cross-contamination.
Are There Any Store-bought Gluten-free Gravy Options Available?
Yes, several store-bought gluten-free gravy options are available in the market today. Many food manufacturers have recognized the growing demand for gluten-free products and have developed gluten-free gravy specifically for individuals with dietary restrictions. These gravies are typically made with alternative thickeners, such as cornstarch or arrowroot, instead of wheat flour.
When looking for gluten-free gravy options, it’s essential to carefully read the labels and check for any gluten-containing ingredients or potential cross-contamination risks. Some brands label their products gluten-free, while others may have a dedicated gluten-free product line. It’s also good to check with the manufacturer or visit their website for more information on their production practices and certifications.
What are Some Gluten-free Alternatives to Traditional Gravy Thickeners?
There are several gluten-free alternatives to traditional gravy thickeners. One popular option is cornstarch, derived from corn and thickens gravies without adding gluten. Another common alternative is arrowroot powder, a gluten-free starch extracted from the roots of the arrowroot plant. It works well as a thickener and gives gravies a glossy appearance.
Additionally, tapioca starch or flour is a versatile gluten-free thickener that can be used in gravies. It has a neutral flavor and creates a smooth texture. Potato starch is another alternative that works well in gluten-free gravy recipes. It is extracted from potatoes and provides a velvety consistency.
And xanthan gum can be used sparingly to thicken gluten-free gravies. It is a powdered substance made from fermenting sugars, creating a thickening effect when combined with liquids.

Easy Gluten-Free Gravy
Equipment
- Saucepan
- Whisk or spoon
- Measuring cups and spoons
- Cutting board and knife
- Stove or cooktop
- Serving dish or gravy boat
Ingredients
- 2 tablespoons of gluten-free all-purpose flour
- 2 tablespoons unsalted butter
- 2 cups of gluten-free vegetable or chicken broth form the gravy base
- 1 teaspoon of gluten-free tamari sauce or soy sauce
- ½ teaspoon of dried thyme
- ½ teaspoon of dried rosemary
- Salt and pepper to taste
Instructions
- Melt butter or dairy-free butter substitute in a saucepan over medium heat. This step helps to create a base for the gravy and adds richness to the flavor. If you’re using a dairy-free option, ensure it is suitable for sautéing and melting.
- Once the butter has melted, add the minced garlic to the saucepan. Sauté for 1 minute until garlic becomes fragrant. Sautéing garlic releases its aroma and enhances the gravy’s flavor.
- Sprinkle the gluten-free all-purpose flour into the saucepan. Use your whisk or spoon to stir continuously until it forms a smooth paste, a roux. The roux thickens the gravy and provides a base for the other ingredients.
- Once you have done this, cook the roux for 2-3 minutes. Cooking the roux ensures the flour is cooked properly and eliminates raw taste.
- Slowly pour in the gluten-free vegetable or chicken broth while whisking the mixture continuously. This prevents lumps and ensures a smooth consistency. The broth also adds flavor and liquid to the gravy. Continue whisking until the mixture is well combined and smooth.
- Add the gluten-free tamari sauce or soy sauce, dried thyme, rosemary, salt, and pepper to the saucepan. You must stir the mixture well to incorporate the flavors. These additional ingredients add flavor and depth to the gravy. Tamari sauce or soy sauce provides a savory and umami taste, while dried herbs, salt, and pepper enhance the overall seasoning.
- Reduce the heat to low and let the gravy simmer for 5-10 minutes. Stir the mixture occasionally while it simmers. Doing this will prevent gravy from sticking to the bottom of the saucepan and ensure even heating. This step also allows the flavors to meld together and the gravy to thicken.
- Once you have followed the previous steps, you must taste the gravy and adjust the seasonings. Tasting the gravy allows you to adjust the seasonings to suit your taste. Add more salt, pepper, or herbs, according to your preference. You can add more salt for a saltier flavor, more pepper for a spicier kick, or additional herbs for extra aroma.
- Once you get the desired consistency, remove the saucepan from the heat. The gravy should have a smooth and thick consistency that coats the back of a spoon. Allow it to cool down for 2 to 5 minutes, and serve the gluten-free gravy hot alongside your favorite dishes, such as roasted meats, mashed potatoes, or vegetables.
Video
Conclusion
Gluten-free gravy complements a variety of dishes. This dip gives you the taste of a traditional gravy recipe without the nutritional downsides. There are many ways to cook this tasty dip. We have discussed the steps to cooking this dip and the nutritional benefits in this article.
Read through this article to get the information you need. Do not forget to like this post and share it across your social media channels.