You don’t need a plane ticket to experience the magic of tiropita. With this simple recipe and a little love, you can bake up a batch of these irresistible pastries right in your kitchen.
Whether you’re a seasoned phyllo pro or a curious newcomer, this tiro pita recipe is your passport to Flavortown. We’ll guide you through every step, from crumbling the perfect feta to folding those paper-thin layers like a pro. Along the way, we’ll share some insider tips and tricks to ensure your tiro pitas emerge from the oven golden brown, crispy, and bursting with cheesy goodness.
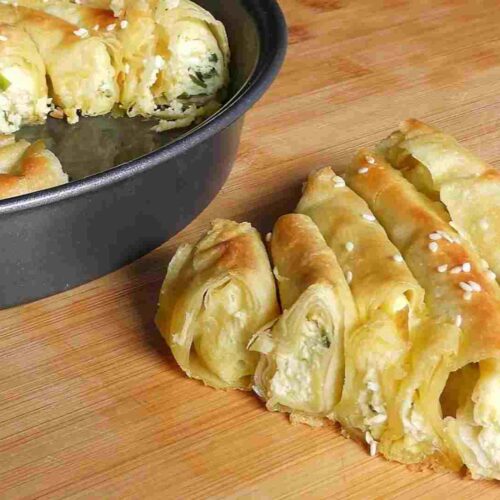
Tiropita Recipe With Phyllo
Equipment
- Mixing bowls
- Baking dish
- Pastry brush
- Clean Surface
- Oven
- knife
- Optional: Chopping Board
Ingredients
- 250 g Feta cheese, crumbled
- Spring onions and parsley
- 2 eggs + pepper
- 5 – 6 sheets of phyllo pastry
- A bowl of melted butter
- Sesame seeds
Instructions
- Preheat the oven to 350°F (180°C) and grease a baking dish.
- In a mixing bowl, combine the crumbled Feta cheese, finely chopped spring onions, and chopped parsley. Mix well to create a flavorful cheese filling.
- In a separate bowl, beat the eggs and add a dash of pepper. Pour the beaten eggs into the cheese mixture and stir until everything is well combined. This will be the filling for the Tiropita.
- Lay out one sheet of phyllo pastry on a clean surface and brush it lightly with melted butter using a pastry brush. Place another sheet on top and repeat the process until you have a stack of 5 to 6 phyllo sheets.
- Spoon the cheese filling along one edge of the phyllo stack, leaving a small border. Carefully roll the phyllo and filling into a log or cylinder shape.
- Place the rolled Tiropita in the greased baking dish, making sure the seam is facing down. Brush the top with additional melted butter and sprinkle sesame seeds for added flavor and texture.
- Bake in the preheated oven for about 25-30 minutes or until the phyllo is golden brown and crispy.
- Allow the Tiropita to cool for a few minutes before slicing and serving. This savory Greek cheese pie can be enjoyed warm or at room temperature.
- Optional: Garnish with additional chopped parsley or a sprinkle of pepper before serving.
Video
Notes
- Ensure the butter is melted but not too hot to prevent it from tearing the phyllo sheets. Brush each sheet evenly for a golden, crispy result.
- Get creative with the filling. Add spinach, ricotta, or other cheeses for a unique twist on the traditional Tiropita.
- When placing the rolled Tiropita in the baking dish, make sure the seam is facing down. This helps to keep it sealed during baking.
- Sesame seeds not only add flavor but also a delightful crunch. Feel free to experiment with other seeds or nuts for added texture.
- Keep a close eye on the Tiropita in the oven. It should be golden brown and crispy. Baking times can vary, so start checking around the 25-minute mark.
- Allow the Tiropita to cool slightly before slicing. This helps the filling set and makes for cleaner cuts.
- Tiropita is versatile and can be served as an appetizer, snack, or light meal. Consider pairing it with a fresh Greek salad or tzatziki sauce for a complete experience.
- You can prepare the Tiropita ahead of time and refrigerate it before baking. This is convenient for entertaining guests; just bake when ready to serve.
Can You Substitute Phyllo?
Yes, you can substitute phyllo pastry in certain recipes, though the texture and taste may differ. Puff pastry is a common alternative, offering a flaky and buttery result. It’s a versatile choice for both sweet and savoury dishes. However, keep in mind that the taste will vary, and puff pastry tends to be thicker than phyllo.
Another option is strudel dough, which is thinner and closer to the texture of phyllo. Though it may not be as readily available as puff pastry, strudel dough can work well in recipes where phyllo is a key component.
For a gluten-free alternative, rice paper or gluten-free phyllo dough can be considered. These options might not provide the same texture, but they can be suitable for those with dietary restrictions.
What Can I Serve As A Side Dish With Tiropita?
1. Fresh & Tangy
Tiropita’s richness craves a counterpoint. A Greek salad bursts with fresh tomatoes, cucumbers, red onion, and Kalamata olives, all dressed in a vibrant lemon-olive oil vinaigrette. This classic combo cuts through the richness and adds a delightful pop of acidity.
2. Hearty & Grounding
Craving something more substantial? Roasted vegetables like eggplant, zucchini, and peppers offer a satisfying bite and smoky depth. Drizzle them with olive oil, herbs, and a squeeze of lemon for a simple yet flavorful side.
3. Creamy & Cooling
Balance the savoury notes with a dollop of tzatziki. This yoghurt-based dip, infused with garlic, cucumber, and dill, cools the palate and adds a touch of luxury. Dip your tiropita triangles, veggies, or even pita bread – it’s a match made in Mediterranean heaven.
4. Let’s Fiesta
Channel the party vibes with a Spanish tortilla. This savoury omelette packed with potatoes and onions is hearty and delicious. Cut it into wedges for easy sharing and watch it disappear faster than a Zorba the Greek solo.
5. Couscous Craze
Skip the rice and embrace Moroccan couscous. Fluffy and flavorful, it’s a blank canvas for vibrant spices like harissa and ras el hanout. Top it with roasted chickpeas or almonds for added crunch and protein.
6. Sweet Surprise
End your tiropita feast on a high note with Greek yoghurt drizzled with honey and walnuts. This simple dessert is light, refreshing, and the perfect way to cleanse your palate and leave you wanting more.
How Do I Store Leftover Tiropita, And Can I Reheat It?
To store leftover Tiropita, wrap it tightly in plastic wrap or aluminium foil and refrigerate it in an airtight container. Proper storage helps maintain its freshness. When reheating, avoid using the microwave, as it can result in a soggy texture.
Instead, preheat the oven to around 350°F (180°C), place the Tiropita on a baking sheet, and warm it for a few minutes until it reaches your desired temperature. This method helps retain the crispiness of the phyllo pastry and ensures a more satisfying texture. If you’re reheating a larger portion, covering it with aluminium foil during the initial warming can prevent excessive browning while allowing the filling to heat through.


